Friday, August 31, 2012

Chicken Lasagna Rolls


Remember those amazing looking chicken lasagna rolls sitting next to the sweet dinner rolls? Well, today I’ll give you guys the recipe. That night I wanted to do something different for my husband and what goes better with those rolls than lasagna? It was late and I really didn’t want to do all the work required for lasagna… so I decided to make lasagna rolls instead. It’s the first time I attempted it, but I think it went pretty good. My husband loved it. Hope you guys enjoy them too! Let me know if you try it!
Ingredients:


For the chicken:
4 chicken breasts (cut in to cubes)
1 onion
1 sweet green pepper
½ teaspoon of salt
1 clove of garlic
4 whole tomatoes
Olive oil (to taste)
1 Tablespoon of unsalted butter
½ teaspoon of fresh oregano
½ teaspoon of fresh basil
½ teaspoon of green onions
½ cup of grated Romano cheese

For the rolls:
6 lasagna sheets
1 cup of mozzarella cheese
½ cup Parmesan cheese
½ cup of Romano
Tomato sauce (to taste)

 Procedure:


Put olive oil on the pan and wait until it's hot. Add the onion, green peppers and garlic.


Add the unsalted butter.


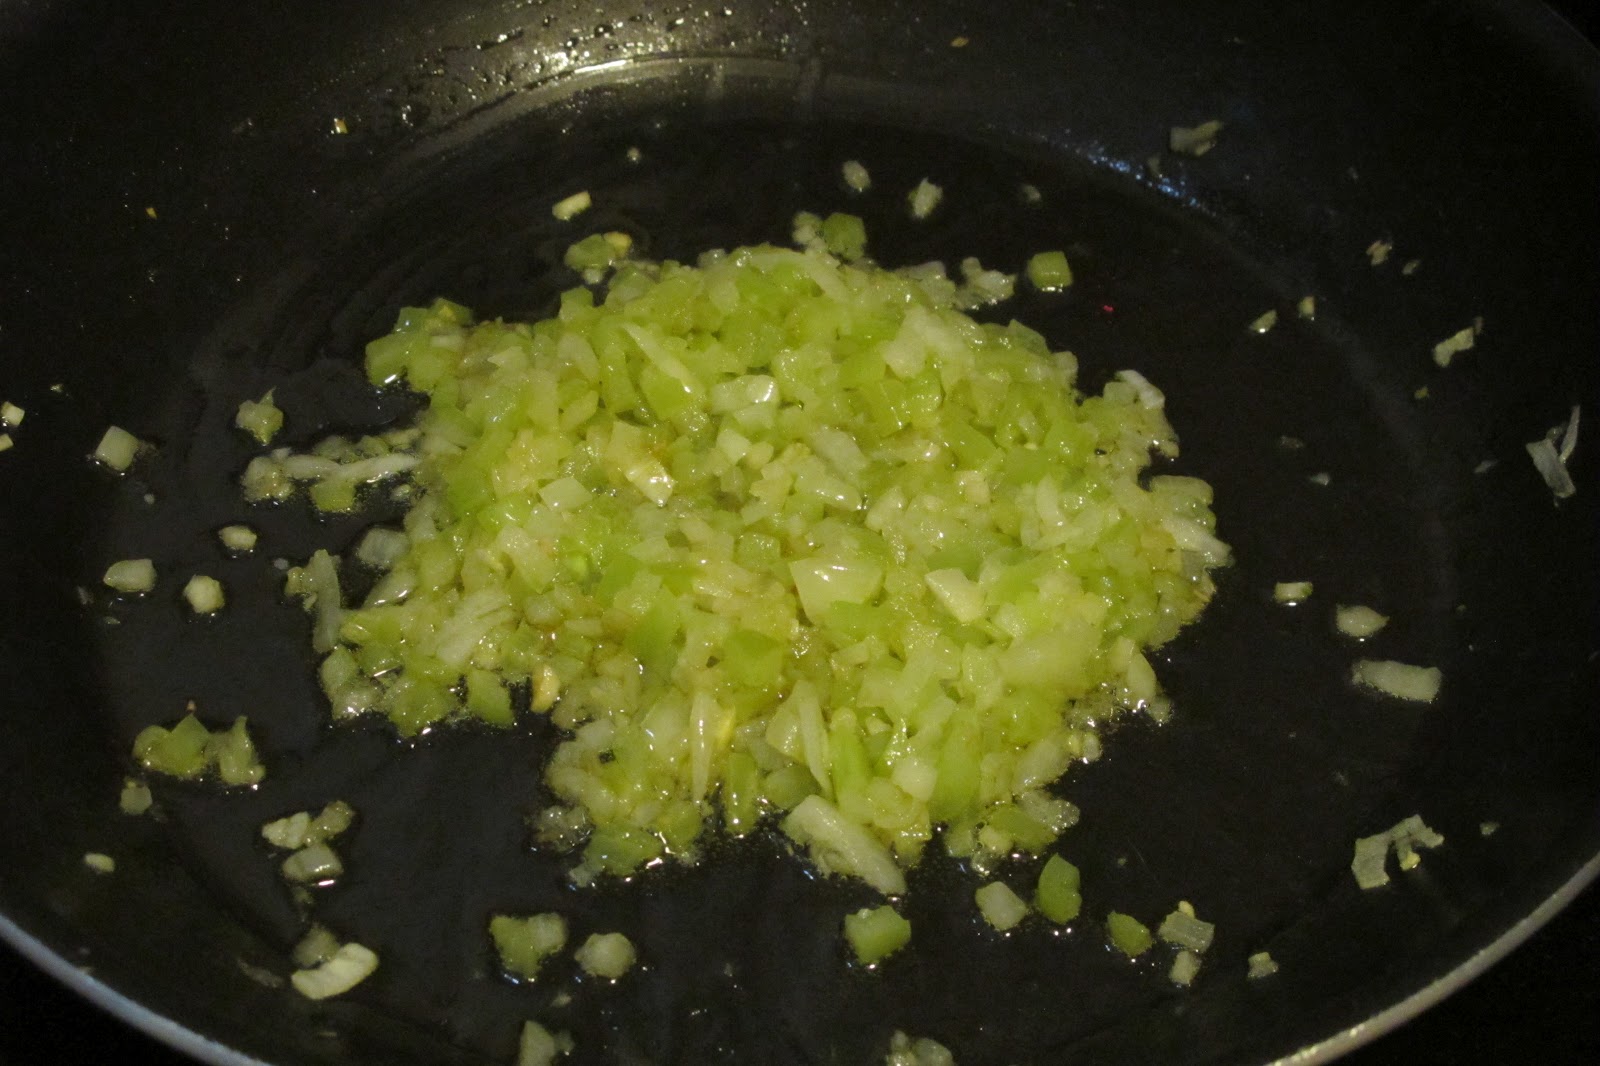
Let it cook until you see the onion is translucent.


Add the chicken.


Cut the whole tomatoes.


Add the tomatoes to the chicken.


 Meanwhile shred the Romano cheese.


Add the herbs to the chicken.


 Add the cheese. Mix everything and let it cook.


Tear the chicken until it's fine. (My husband did it for me and he used a potato masher, instead of tearing it.)


 The end result should look like this.


This is what I used to fill the rolls.


Lasagna "sheet"


Chicken filling


Add the mozzarella


Add the Romano cheese.


Roll the lasagna with the filling. Put it in the pan sheet.


 You should have 6 rolls.


 Add your favorite tomato sauce to taste.


Add cheese on top of the rolls and put it in the oven @ 350 degrees until you see that the cheese has melted.

ENJOY!!!

Thursday, August 30, 2012

Caramel Sauce


I’ve had a love affair with caramel since my childhood; hey who hasn’t! It’s so versatile. It has so many different textures and lots of possibilities! Caramel candies, caramel sauce for sundaes, caramel for custards and flans and caramel lollipops, among others. I thought all this baking, cooking and making candies was very difficult. The reality is that it's not that difficult. The important thing is to, as Julia Child said “read the recipe”, and of course have all the ingredients at hand. Well today I overcame one of my biggest cooking fears, making caramel sauce. There are different recipes for caramel sauces. The one I’m about to show you is a caramel sauce that, despite having a deal of sugar and milk, is on the savory side. (Later next month I will be sharing a sweeter caramel sauce.) This sauce is awesome with ice cream! The vanilla ice cream you see in the photo is a recipe I will share with you guys next month! Enjoy this recipe, I hope the taste of caramel bring you fond memories from your childhoods!


Ingredients:
1-½ cups of white sugar
1/3 cup of water
1-¼ cups of heavy cream
½ teaspoon of vanilla extract

Procedure:


Put the sugar in a medium saucepan


 Put the water in the saucepan


Wait until you see that the water has covered the sugar completely.


It's very important that if you don't have a lot of experience working with sugar you use a  candy thermometer. This is a must!


Start cooking on low heat without stirring, for 5 to 10 minutes.


After the 10 minutes, increase the heat to medium and boil uncovered until the sugar turns a chestnut color or simply do as I did put the thermometer until it reaches 350 degrees Fahrenheit. (I used another thermometer so you guys can see a different kind)


This is the color the caramel will have, once it reaches the 350 degrees Fahrenheit. Turn off the heat. And stand back to avoid splattering.


Slowly add the heavy cream. The cream will bubble and solidify, don't worry about it. Stir constantly.


Add the vanilla extract and continue to stir.


Continue stirring until the caramel dissolves and the sauce is smooth.


Pour the mixture in a glass measuring cup. Allow the sauce to come to room temperature, at least 4 hours. 


The caramel sauce will get thicker as time passes by.

Tip:
If the sauce gets too thick, you can reheat it in the microwave.

Wednesday, August 29, 2012

Macerated Strawberries


This is a very yummy recipe! This past summer summer I was craving something refreshing, so I decided to macerate strawberries. This recipe is very diverse. You can make sundaes, milkshakes or us it as a topping. My husband loves to eat it with ice cream! Enjoy!
Ingredients:
1 pound of frozen strawberries
3 Tablespoons of white sugar
1/2 Tablespoon of lemon juice

Procedure:
Measure the pound of strawberries on a scale.


Cut the strawberries in pieces.
  Put the strawberries in a bowl; add the sugar and lemon juice.


Mix it well cover the bowl with cellophane paper.


Wait until the strawberries defrost and you see the syrup.

Tips:
You can use this strawberry syrup on ice cream, custards, or cheesecakes!

Tuesday, August 28, 2012

Buttermilk Chocolate Cake


Yesterday I gave you guys the recipe for the buttermilk chocolate frosting, today I will be posting the recipe for the buttermilk chocolate cake.  This cake is awesome! I found the recipe in the better homes and gardens book, 1996 edition. It’s sort of a cross between a chocolate cake and a big brownie. It tastes delicious. Let me know if you made it and how it went. :) Remember to use the chocolate buttermilk frosting recipe I posted yesterday!

Ingredients:
2 cups of all-purpose flour
2 cups of sugar
1 teaspoon baking soda
¼ teaspoon of salt
1 cup of unsalted butter
1/3 cup of unsweetened cocoa powder
1 cup of water
2 eggs
½ cup of buttermilk
1½ teaspoons of vanilla extract

Procedure:
1   Preheat the oven to 350 degrees.
2   Grease a 15x10x1 inch or a 13x9x2 inch pan.
3   Combine flour, sugar, baking soda, and salt in the kitchen aid mixing bowl.
4   In a medium saucepan combine butter, cocoa powder and a cup of water. Bring mixture to a boil, stirring constantly.
5   Remove from heat. Add the chocolate mixture to the dry mixture and beat in an electric mixer on medium to high speed until thoroughly combined.
6   Add the eggs, the buttermilk and the vanilla. Beat for one minute, the batter will be thin. Pour the batter into the prepared pan.
7   Bake the 15x10x1 inch pan for 25 minutes or the 13x9x2 inch pan for 35 minutes, or until the cake tester comes out clean.
8   Once out of the oven, you can make the buttermilk chocolate frosting recipe and pour it over the cake while it’s warm.
9   Let it cool thoroughly on a rack.

Monday, August 27, 2012

Buttermilk chocolate frosting


Hi I’ve been needing to make a new chocolate frosting recipe so I started looking in my cooking books and found the better homes and gardens book, 1996 edition. 
They have a buttermilk chocolate frosting that is to die for! It’s a pretty easy recipe and the results are very tasty! Tomorrow I will be posting the recipe for the chocolate cake in the picture. Hope you guys love it!

Ingredients:
¼ cup of unsalted butter
3 Tablespoons of unsweetened cocoa powder
3 Tablespoons of buttermilk
2 ¼ cups of sifted confectioner’s sugar
½ teaspoon of vanilla extract

Procedure:
1   In a small saucepan combine the butter, buttermilk and cocoa powder.
2   Bring to a boil.
3   Meanwhile put the confectioner’s sugar in the mixing bowl.
       Remove the saucepan from heat as soon as it’s started boiling.
     Add the chocolate mix to the confectioner’s sugar while mixing with the whisk attachment. Your mixer should be set to stir.
6   Once the chocolate and the confectioner’s sugar are partially mixed add the vanilla extract. 
7 Beat until smooth.

Sunday, August 26, 2012

Lemonade


I’ve been making lemonade for some time now and this recipe is the best so far. When you dissolve the sugar in a saucepan, turning it into syrup rather than just mixing in the crystals, it allows the sugar to fully dissolve in the lemonade, rather than sinking to the bottom.

Ingredients:
2 cups of water
¾ cups of white sugar
3 lemon peels
¾ cups of lemon juice


Procedure:
1)   Put the water, sugar and lemon peels in a medium saucepan on medium to high temperature until all the sugar dissolves.
2)   Once the sugar is dissolved let it rest until cool.
3)   Put the ¾ cups of lemon juice in a jug.
4)   Once the mixture has fully cooled put it in the jug and mix it well.

 Enjoy!

Tip:
Multiply this recipe by 4 and you will have a gallon of lemonade!

Saturday, August 25, 2012

Sweet Dinner Rolls


There is no better day than today to make this awesome recipe, sweet dinner rolls! It may seem like it's a difficult recipe because it takes a little bit of time while you wait for the bread to rise. But let me tell you it's totally worth it once you take a bite out of your homemade bread. There is nothing better than a nice cup of coffee with a homemade, fresh baked dinner roll. Hope you guys enjoy this recipe as much as me and my husband. He couldn't wait to get his hands on this dinner rolls!
You may have noticed a little something extra on the plate. Look for that later this week. ;)
Ingredients:
3 cups of bread flour
2 teaspoons of active yeast
1 1/4 teaspoons of kosher salt
3 tablespoons of sugar
¼ cup of Klim milk (powdered milk)
4 Tablespoons of unsalted butter
1 1/8 cups of hot water (110 - 120 degrees)
2 teaspoons of olive oil

Procedure:


1)   Put half the flour, along with the salt and yeast, into the mixing bowl. Set the mixer to stir with the hook attachment for two minutes.


2)   Meanwhile heat the water to a boil in a pot then remove from heat and add the butter. Stir until it has fully melted into the water.


3)   Add the sugar and powdered milk to the mixing bowl.


4)   Add the butter/water mixture into the mixing bowl. Continue mixing on low speed (setting 2 or 3) while scraping the sides of the bowl with a rubber spatula.


Remember to scrap the bowl

5)   Once that has fully combined raise the mixing speed to medium (setting 4) and add the remaining flour slowly. Preferably use a small spoon to scoop the flour in bit by bit. You may not need to add all of the remaining flour. As you add the flour, gently press your fingertips against the mixture. If the mixture sticks to your fingers keep adding flour.

   6)   Allow the mixture to combine well (about 5 minutes). You’ll know it’s mixed completely because the machine will loudly “kick” as the batter has coalesced onto the hook and begins to bang against the sides of the bowl without sticking. During this mixing period you may add spices or seasonings to the batter.

7)   Use the same rubber spatula to scrape the batter from the sides of the bowl, and the hook. Remove the batter from the bowl and pour part of the olive oil into the empty bowl making sure to coat the bottom and sides of the bowl with the oil. Put the batter back in the bowl and pour the remaining olive oil over the batter so as to also coat it.


8)   Cover the bowl with aluminum foil and let it rest in a warm spot. During this time (approximately 1 hour) the batter will make its first rising and should double in size.


9)   Once the batter has risen line a baking sheet with parchment paper and pre-heat the oven to 375 degrees.


      10)  Put the batter on a wooden board (you won’t need to grease or flour the board because the batter already has oil). Shape the batter into a long straight line, like a baguette. Cut the batter into small rolls (about a dozen). Take each roll and shape them into balls then place them onto the baking sheet. Make sure to leave 1 ½ to 2 inches between the balls.


 11)  Lightly drizzle some additional olive oil over each of the balls and sprinkle them with a little kosher salt.

12)   Let them rest in a warm spot for 15 minutes for the second rising.


13)   Put them into the oven for 15 minutes or until they are golden brown.


14)   Enjoy!